
Nowadays everywhere we using a virtual machine instead of a dedicated server, the reason is getting the flexibility of multiple OS in single Hardware server/system.
It is also good for the budget and management of multiple servers from a single dashboard.
When we use VMware ESXi, there is a common problem for guest machine or virtual machine is not starting on machine reboot.
Suppose, you have configured your server with multiple virtual machines for various purpose and make it production. After some time due to some reason your machine gets rebooted but virtual machine not. In this case, your machine showing up but virtual machine/server is down so you can face big downtime.
You can recover a virtual machine from the outage mentioned above; there is an option to boot your virtual machine automatically when your hardware gets a reboot.
In this article, I’ll show you how to configure virtual machine auto start on system restart under VMware ESXi.
Configure Virtual Machine auto start on VMware ESXi using vSphare client: –
Configure Virtual Machine autostart using vSphare client follow below explained steps.
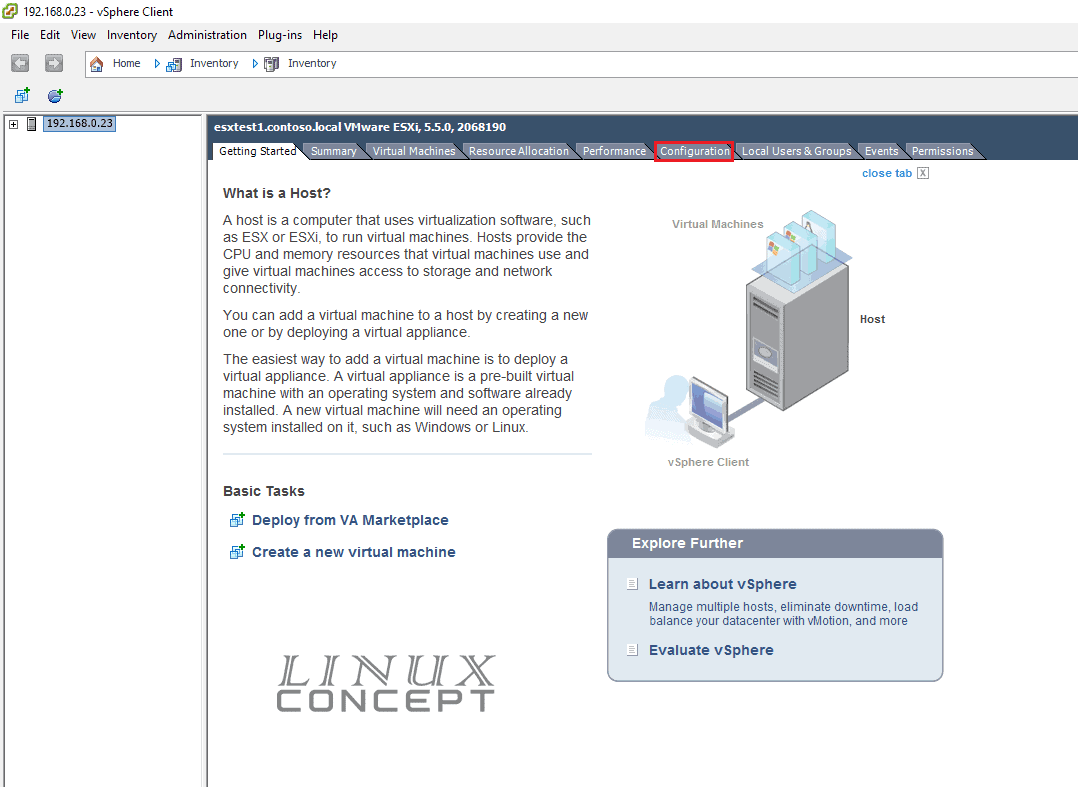
Step 1
Login on the vSphare client. You will get lots of tab on the right side of the panel. Click on the “Configuration” tab to explore options, as shown below.
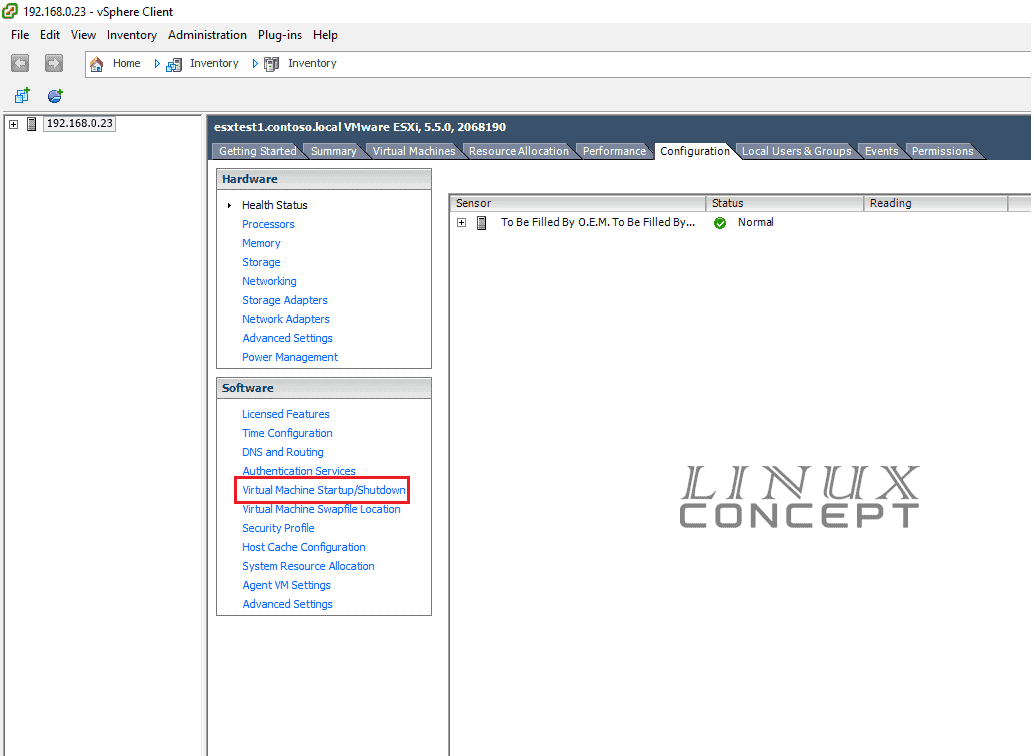
Step 2
There are multiple configuration options in this tab; you need to click on “Virtual Machine Startup/Shutdown” option, as shown below.
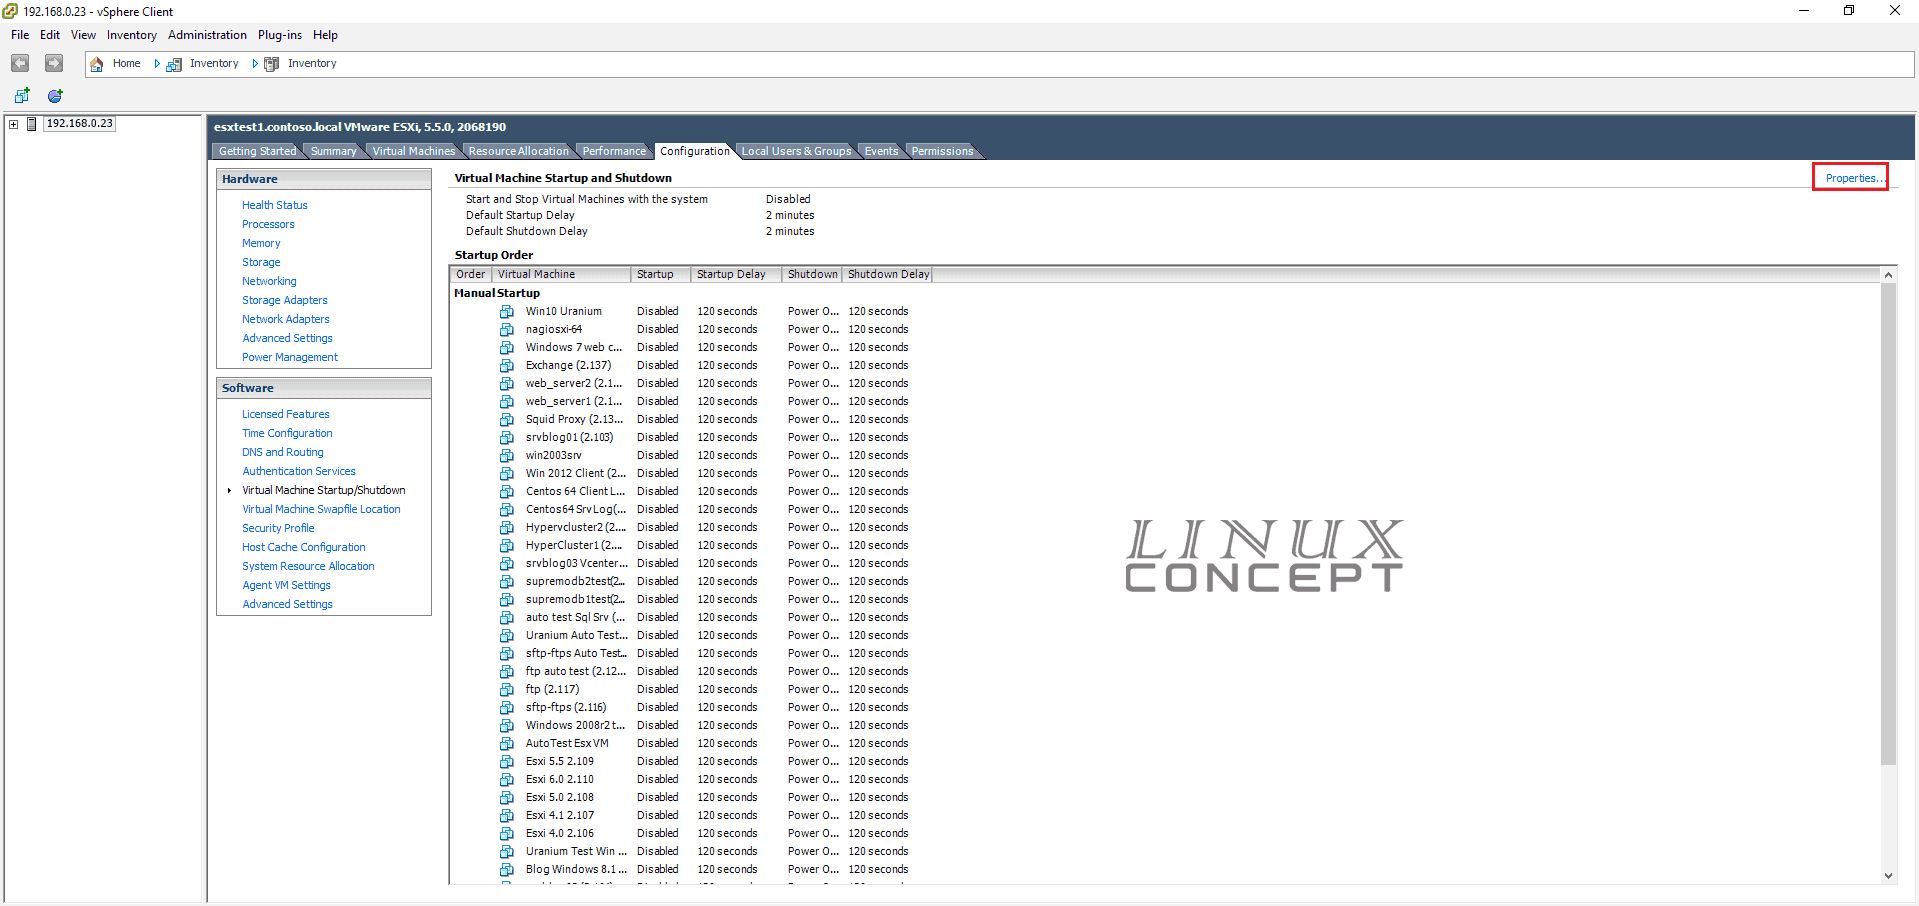
Step 3
Now click on “Property” at top right corner.
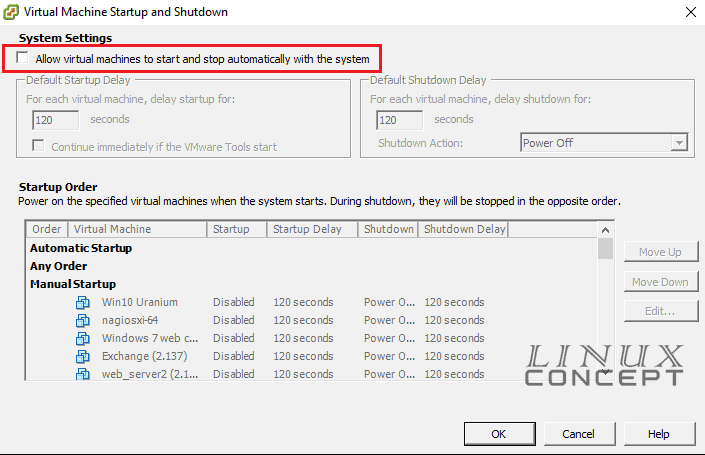
Step 4
Now in this new window, you will get all option to configure your virtual machine for auto start. To do this first check “Allow virtual machine to start and stop automatically with the system”, after selecting this other option will enable for “Default Startup Delay” and “Default Shutdown Delay”. Here you can set time for auto startup and shutdown delay in seconds as below image.
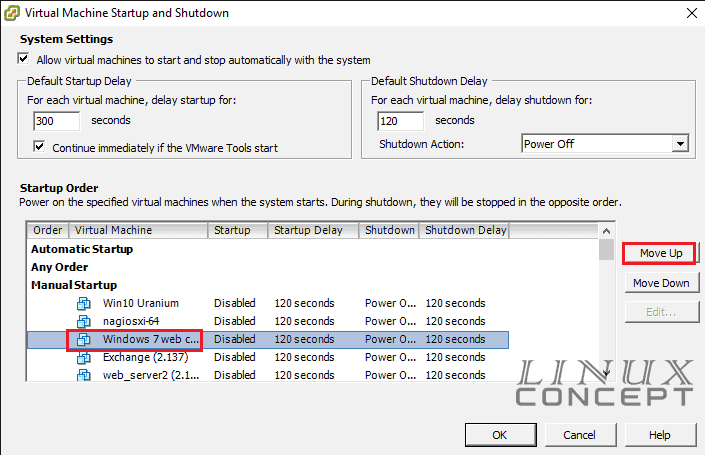
Now, you need to choose a virtual machine from the list and click on the “Move Up” button to move up and click it till virtual machine move up into the Automatic Startup section.
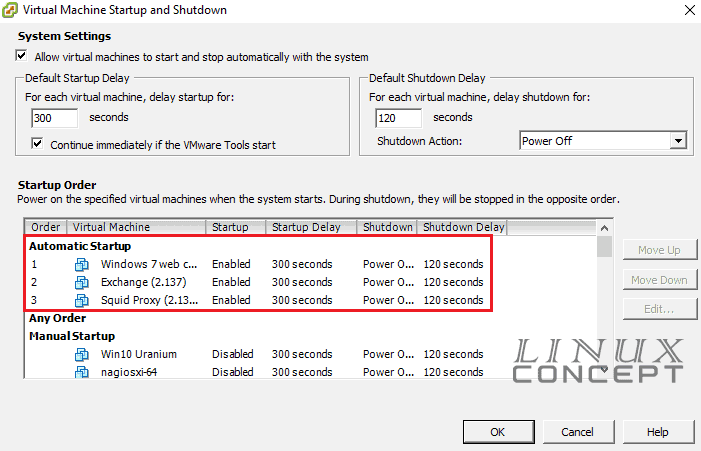
When a virtual machine configured for the auto startup, it will look like the below image where I set my Windows 7, Exchange, and Squid Proxy virtual machine for auto startup.
Step 5
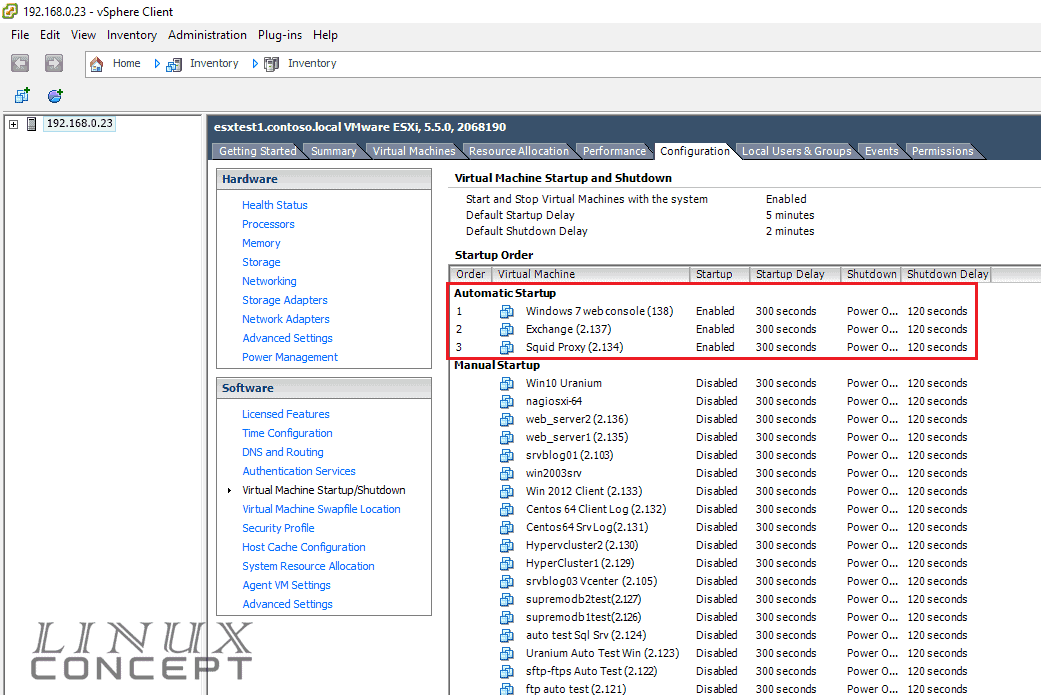
Now click on the “OK” button to save changes. In your main configuration will also you can check your changes as below image.
Now, your virtual machine configured for auto startup.
Configure Virtual Machine auto start on VMware ESXi using vSphare web client: –
After VMware ESXi 6.5 release the have not to build a vSphare client to install on the system, and they start supporting web interface where you can directly login and browse your server on a web browser using your server IP.
To configure your virtual machine autostart using web client follow below explained steps.
Step 1
Login on the server using a web browser.
Suppose your server IP is 192.168.0.5, you can log in on ESXi server using https://192.168.0.5/ui url.

Step 2
Click on “Virtual Machines” option on the left side menu bar to browse all virtual machine as shown below.
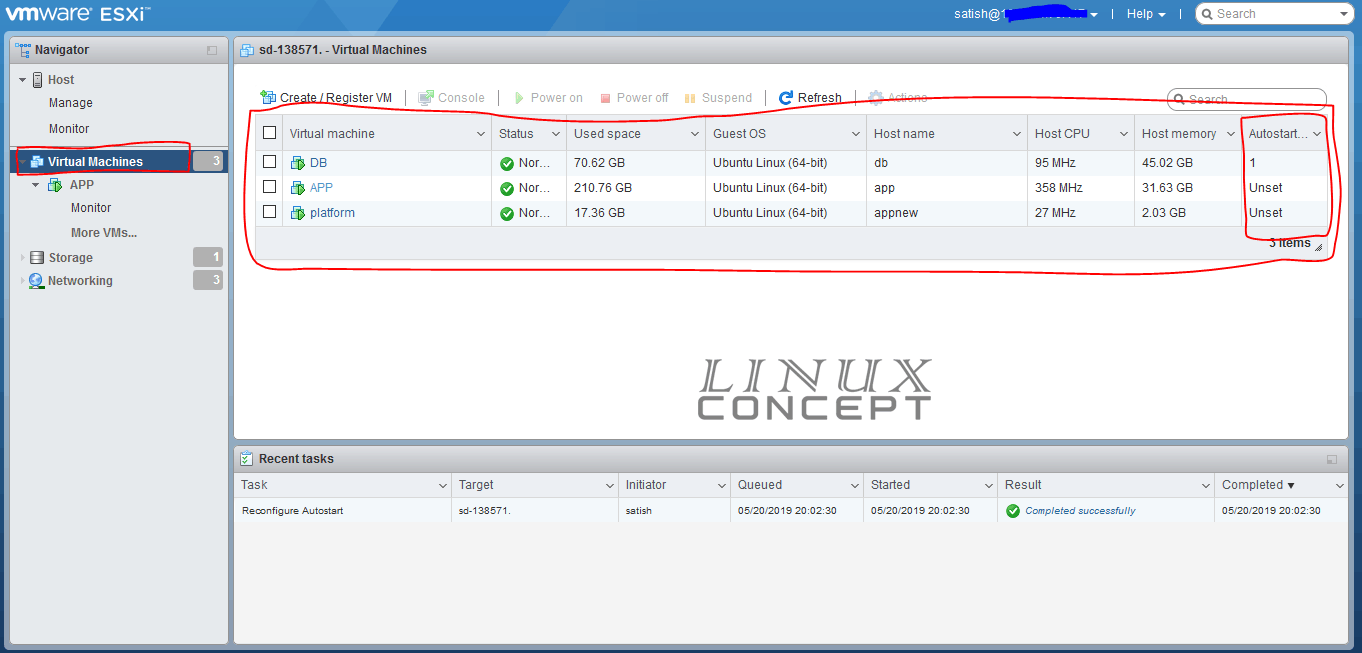
Here you can see the column “Autostart” is set 1 for DB virtual machine and unset for others, means the virtual machine DB has configured for autostart, but other virtual machines are not.
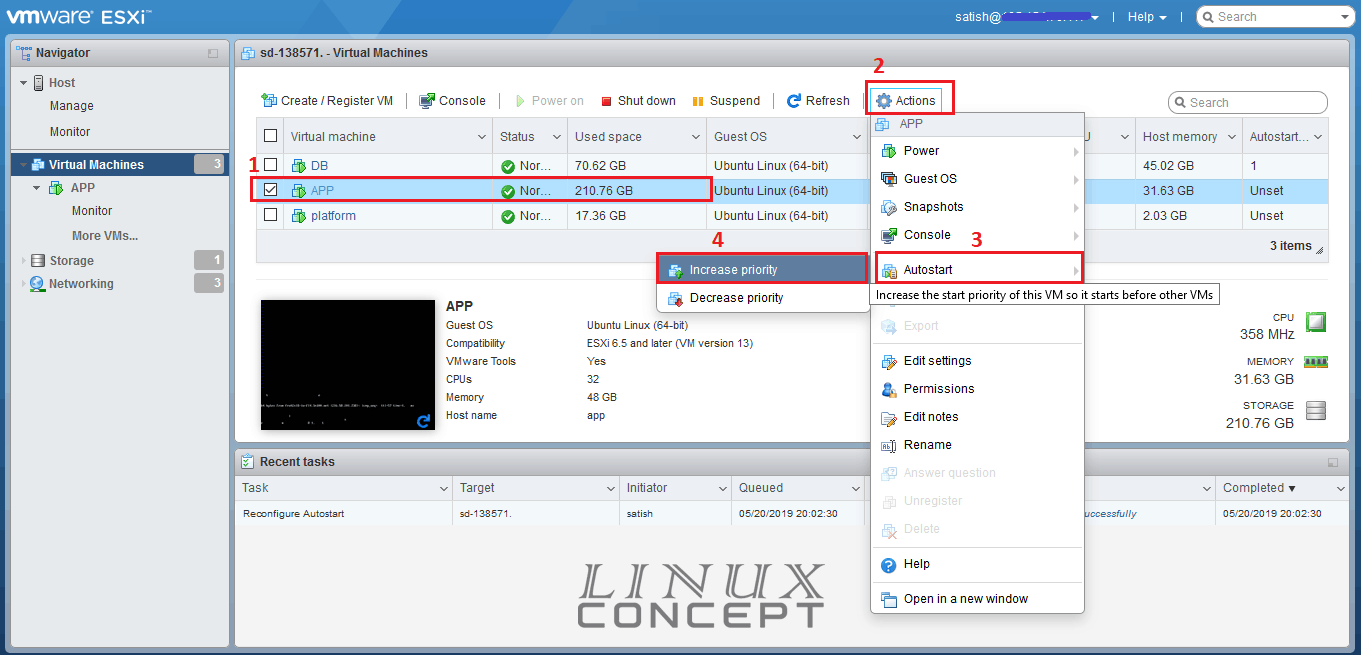
Step 3
In this step, we will configure the “APP” virtual machine for autostart. To configure its auto start first select the virtual machine then click on the “Action” menu. Click on “Autostart” menu in Action’s drop-down menu and choose “Increase Priority” to set the autostart priority for the virtual machine as shown in the below image.
Step 4
Now you can see in the column “Autostart” value is 2 for the virtual machine “APP” which is indicating the virtual machine is configured for auto start and priority is 2 means first start virtual machine “DB” then it starts “APP”.
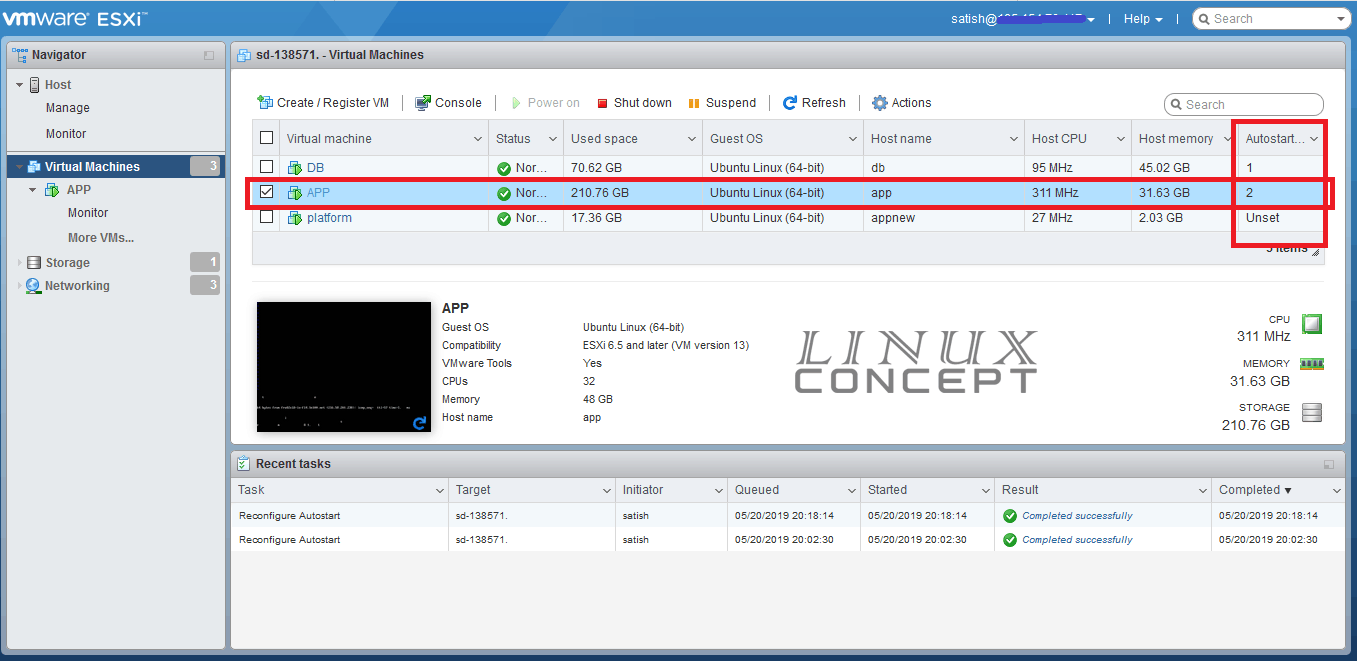
Now your virtual machine “APP” is configured for autostart.
Today, you have learned to configure your virtual machine auto start on VMware ESXi using vSphare client or web browser using the inbuilt web client.
If you have any doubt, you can ask on the comment.
0 Comments