The Ubuntu 20.04 Operating system comes with PHP version 7.0, and you can install like any other application package using the apt package manager.
Today, in this article, we will learn to install PHP 7.2 on Ubuntu 20.04 machine.
Prerequisites
To perform practical stuff of this tutorial, make sure you have Ubuntu 20.04 installed machine and user to log in on system with sudo privileges.
Install PHP 7.2 on Ubuntu 20.04
To install PHP 7.2 on Ubuntu 20.04 operating system follow below steps:
Step 1: Update package list and install dependencies
To install any package on Ubuntu system need to update the repository’s package list by using the following command:
$ sudo apt updateAfter updating package first need to install dependencies library package, as shown below:
$ sudo apt install apt-transport-https ca-certificates curl software-properties-commonStep 2: Enable Ondrej’s repository To enable repository first import the repository’s GPG key using curl command:
$ curl -fsSL https://packages.sury.org/php/apt.gpg | sudo apt-key add -After importing GPG key, you can enable the Ondrej’s repository by using the following command:
$ sudo add-apt-repository "deb https://packages.sury.org/php/ $(lsb_release -cs) main"Step 3: Install PHP 7.2 After enabling the Ondrej’s repository, again update the package list and install PHP by using the following command:
$ sudo apt update
$ sudo apt install php7.2-common php7.2-cli
Step 4: Verify Installation You can verify the php installation by checking the version of PHP by using “php –v” command, as shown below:
$ php –v
Configuring Apache to run PHP
If you are running the PHP application on the web browser, you have to configure it with web server Apache or Nginx. In this section, we will see how to configure an Apache web server with PHP 7.2. To configure PHP with apache, you have to install PHP and apache library for PHP by using below command:
$ sudo apt install php7.2 libapache2-mod-phpAfter installation of PHP and apache library restart the apache service:
$ sudo systemctl restart apache2Configure Nginx to run PHP
Nginx doesn’t have built-in support for PHP like an apache web server. So, to use Nginx with PHP need to install another application PHP FPM, which will handle PHP files and operation. You can install PHP and PHP FPM package by using the following command:
$ sudo apt install php7.2 php7.2-fpmOnce the PHP FPM package installed in your system, you can handle it like any other application. You can enable, start, or stop services. You can check the status of PHP FPM by using below command:
$ systemctl status php7.2-fpm
To use PHP FPM with Nginx web server, need to edit the server block and add the following code so the Nginx can process php files using PHP FPM:
server {
    # . . . other code
    location ~ .php$ {
        include snippets/fastcgi-php.conf;
        fastcgi_pass unix:/run/php/php7.2-fpm.sock;
    }
}
After configuring the server block, need to restart Nginx service by using below command:
$ sudo systemctl restart nginxInstall PHP extensions
PHP has numbers of functionalities, which can have enabled by using several numbers of PHP extensions. To enable those features, need to install PHP extension by using the following command syntax:
$ sudo apt install php-[extname]For example, if you want to install GD, IMAP PHP extension, you can install by using the following command:
$ sudo apt install php7.2-imap php7.2-gdAfter installation of PHP extension, you need to restart webserver apache/nginx and PHP FPM services.
Testing PHP
You can test PHP by using a web server, and you can identify PHP is running by a web server. To verify PHP with the webserver, create a new file with name info.php inside the web server’s root directory “/var/www/html” with the following code:
<?php
phpinfo();
Save the file and open the file into a web browser like below:
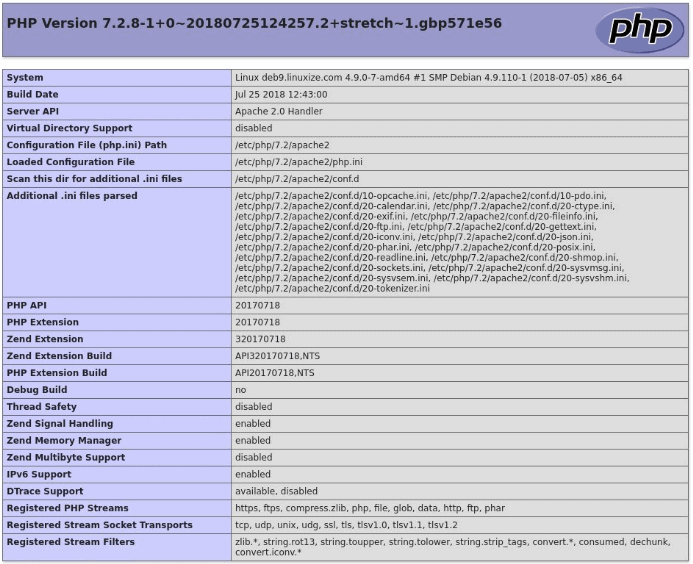
http://server-ip/infoe.phpThe function phpinfo will print the information about PHP configuration as shown as below image:

Conclusion
Now, you have learned “How to install PHP on Ubuntu 20.04 Operating System?” and also learn to configure PHP with a web server like Apache or Nginx.


0 Comments