
Nowadays Linux operating system’s popularity is increasing. Most of the servers are using the Linux Operating System, and personal system also start using various Linux distribution. Fedora is one of the popular Linux operating systems.
These days most of the IT professionals learning Linux, as their work environment around Linux based open source and free operating system.
As per my experience, when you are learning anything and for a silly mistake, you are going to format the entire system and reinstall, again and again, the learning period going to be very frustrating and bored.
So, I am suggesting you to at learning time use a virtual environment to configure any Linux and use if any mistake will happen you need to reinstall the only virtual machine, not the system. Or you can keep the previous virtual machine for your experiment to learn to troubleshoot the problem and parallelly you can run new vm to move your learning ahead.
Here, in this article, I am going to explain “How to install Fedora 27 Linux in VMware workstation?”. You can use any other virtual environment also like Virtualbox, VMware Player, KVM, etc.
Prerequisites – Fedora 27 Linux installation
Fedora 27:
Download Fedora 27 here.
Virtual Environment:
Download VMware Workstation from here.
Download VMware Player from here.
Download Virtualbox from here.
Anyone application is enough for a virtual environment, I am going to use here VMware Workstation, but the overall process of installation is the same for all virtual environment package.
Installing Fedora 27 in VMware Workstation
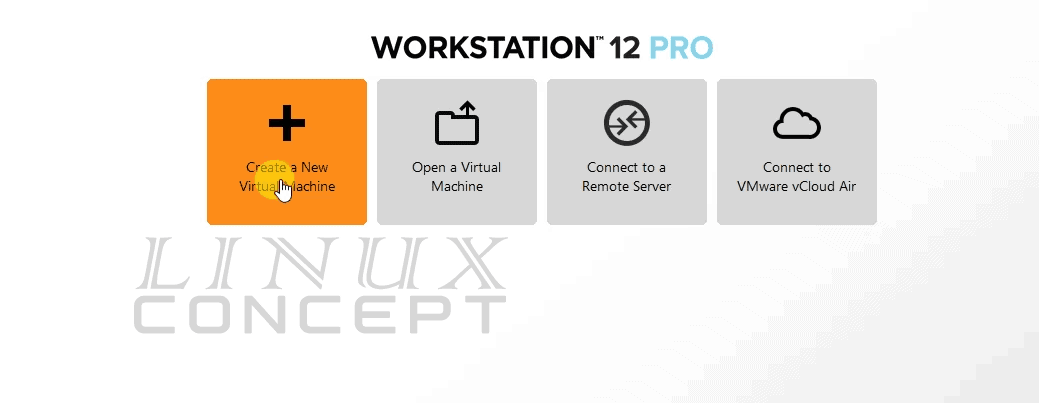
Below is the first screen when VMware Workstation open to create a new virtual machine. Click “Create a New Virtual Machine”.
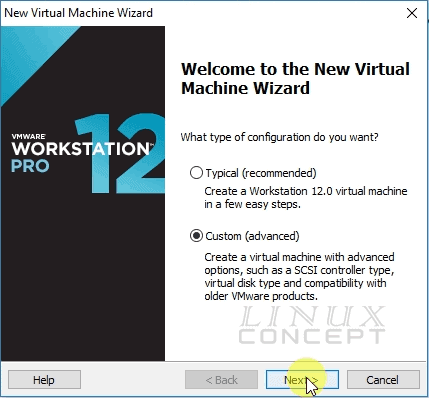
The new window will appear for creating a virtual machine; here I select “Custom (advanced)” option to configure a new virtual machine for the Fedora operating system.
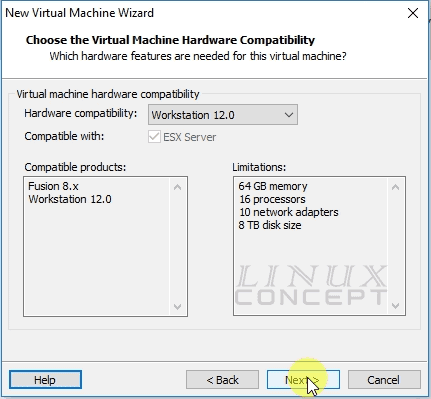
This window will appear to choose Hardware compatibility for a virtual machine’s operating system. As I am using VMware WorkstationPro 12 so I select “Workstation 12.0” and click on “Next” button for further process.
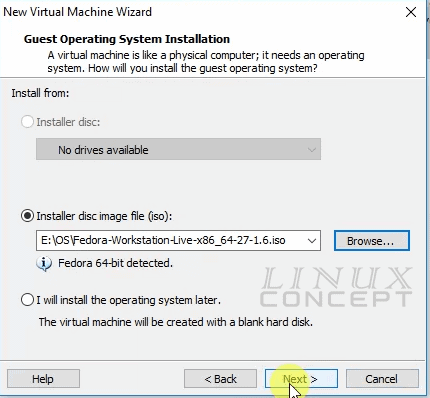
The new window appears to choose the new virtual machine’s operating system installation media.
There are three options here:
- Installer disc
- Installer disc image disc (iso)
- I will install the operating system later
The first option “Installer disc” used when we are using physical CD-ROM to install the operating system in the virtual machine.
Second option “Installer disc image file (iso)” use when we have ISO image for the operating system and going to use this iso file for install in the new virtual machine.
The third option we choose when, we are just configuring a virtual machine, and operating system installation is part of another time.
I select here “Installer disc image file (iso)” and select fedora iso image and click on “Next” button for further process.
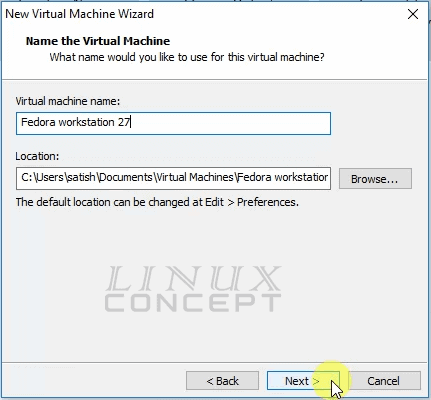
In this window, we can configure Virtual machine name and installation location, like I configure a name for this virtual machine is “Fedora workstation 27” at below image.
After configuring the name of virtual machine click on the “Next” button for further process.
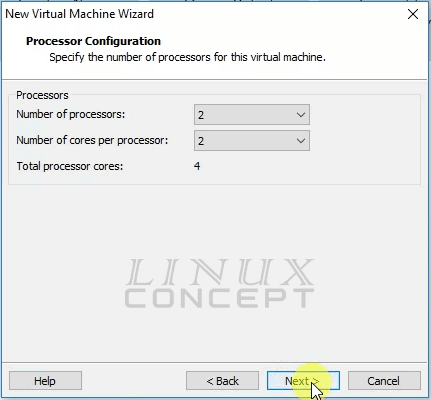
In the new window we can configure processors (CPU) for a virtual machine, Here we can select “Number of processors” and “Number of cores per processors” and click “Next” button for next step.
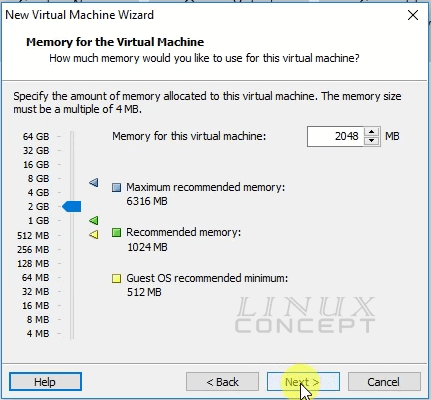
Now time to configure Random Access Memory (RAM) for the virtual machine.
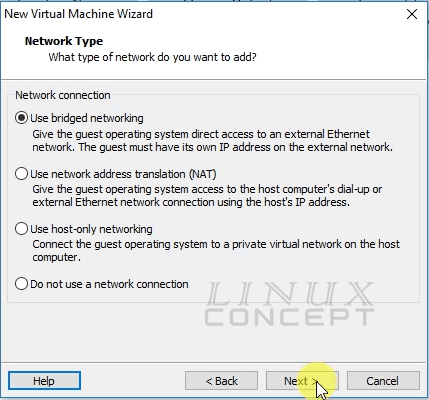
In this configuration screen of VMware workstation, we are configuring networking for the new virtual machine.
There are multiple options for configuring Networking like below:
- Use bridged networking
- Use network address translation (NAT)
- Use host-only networking
- Do not use a network connection
The first option “Use bridged networking” is used to connect the virtual machine with a network through bridged and it gets IP directly from the network device. So after connection your host and guest in the same network.
The second option, “Use network address translation (NAT)” will get NAT connection through your host network. In this case virtual machine network connection through host network, where host release an IP for a virtual machine but your host and guest machine using the same IP for connection. So virtual machine all network connection through via host network.
The third option, “Use host-only networking” is used to connect the virtual machine with host only. In this connection virtual machine only connect with the host machine but not from the internet or wide area network.
The last option, “Do not use a network connection” is used when we don’t want use networking in the virtual machine.
I choose here “Use bridged networking” to connect with internet, host and another host also in the same network.
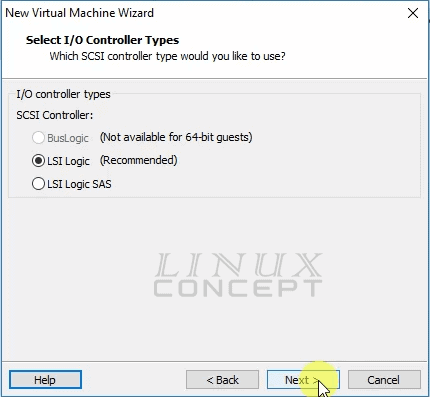
This new screen to configure I/O controller types, where also we have three option like
- BusLogic
- LSI Logic
- LSI Logic SAS
As you can see in the below picture “BusLogic” is not available for 64-bit Operating System, and I choose Debian 8 64-bit ISO, so this option is not available for this virtual machine.
Another option “LSI Logic SAS” is for the disk when we use from SAS storage, but here I am not using SAS disk, so this is not the option for me.
One more option is “LSI Logic” which is for inbuild disk, and I am using the same disk, so I choose this option here.
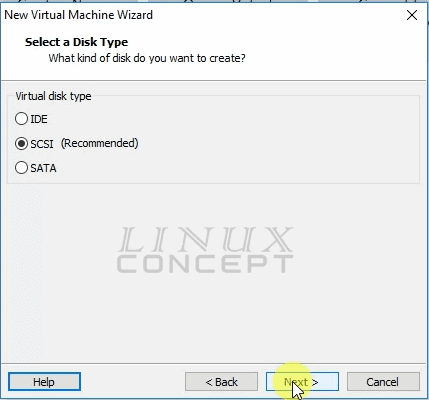
In this new screen, we can choose disk type, where I select “SCSI” which is also recommended for vmware virtual machine too.
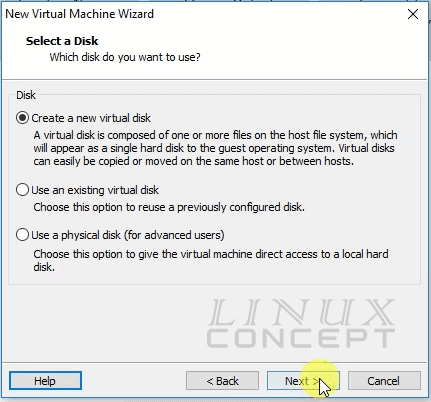
In this screen you configure Disk with these options:
- Create a new virtual disk
- Use an existing virtual disk
- Use a physical disk (for advanced users)
The first option “Create a new virtual disk” is used to create a new virtual disk on your system which will be formatted by the virtual machine and install a new operating system.
The second option “Use an existing virtual disk” used to using already created virtual disk file system. This option is useful if we want to use the previously built virtual machine in the different system or taking backup from the virtual disk, etc.
Third option “Use a physical disk” is for an advanced user, because using this option we store the virtual machine in physical disk and storage will use the direct physical disk.
I select “Create a new virtual disk” as I am going to create a new virtual disk for this new virtual machine.
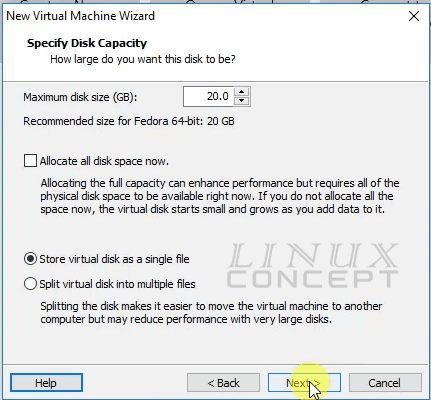
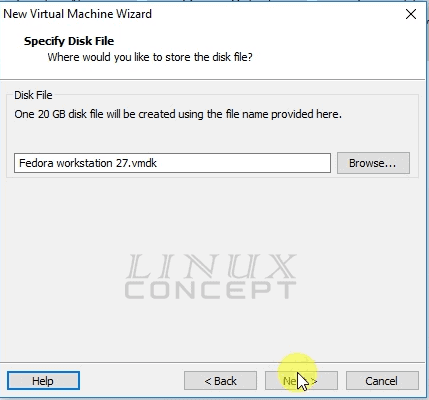
In this window, you can configure a virtual disk size. I have set 20 GB for virtual disk and choose “Store virtual disk as a single file” to use a single file for the virtual disk.
I have also not selected “Allocate all disk space now” to assure disk storage as per requirement, where it not use all storage from the beginning and use storage when it is required.
In this window, you can configure a name for the virtual disk.
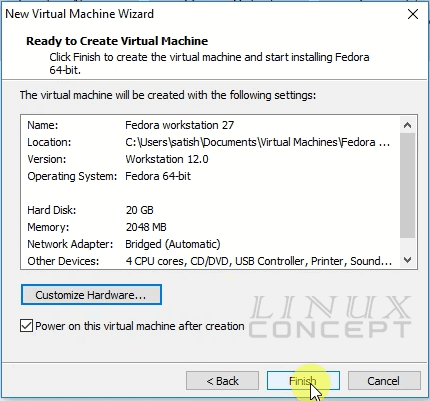
Now, you will get a virtual machine configuration summary. Here you can configure virtual machine’s hardware again if required by clicking on the “Customize Hardware” button.
And click on the “Finish” button to complete the virtual machine configuration.
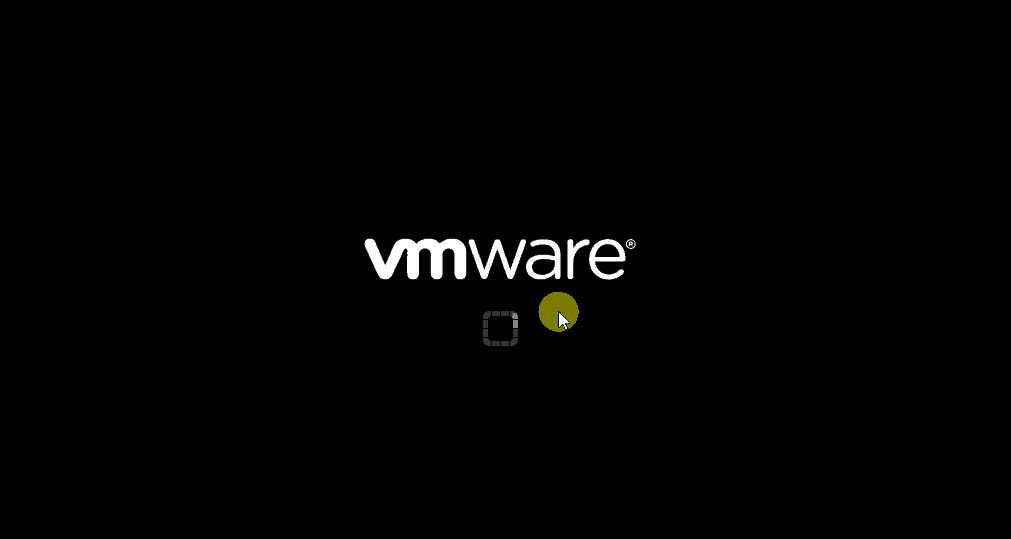
Now when we start the new configured virtual machine, we will get the below screen.
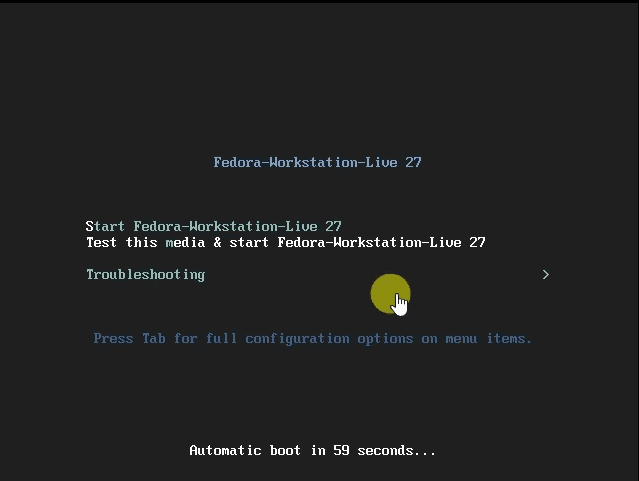
Now, below screen represent new virtual machine boot with Fedora ISO image. In this window, I select the option “Test this media & start Fedors-Workstation-Live 27”.
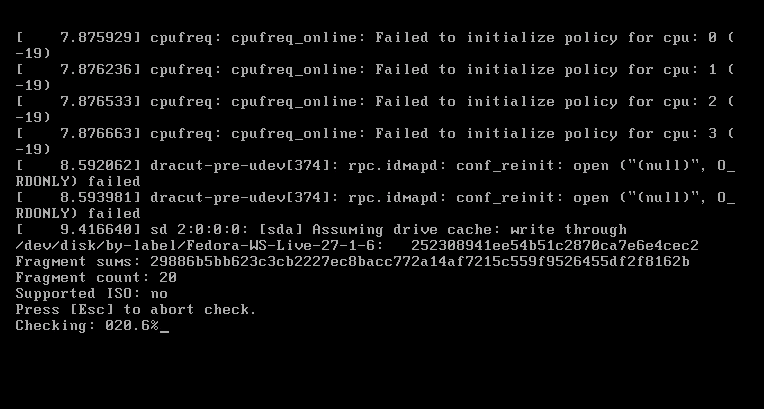
Below screen display when the installation process is checking installation media and being ready for installation.
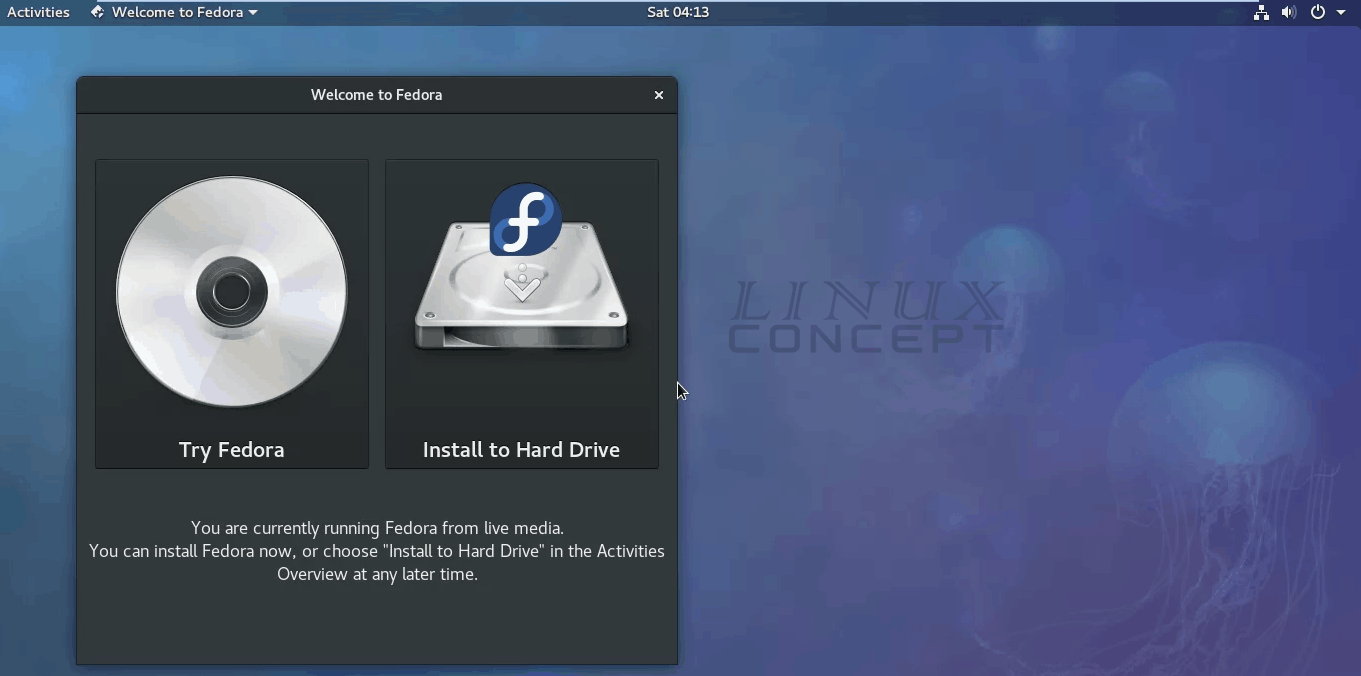
Now, the new virtual machine will start with Fedora ISO image, and we are getting an option to install to Hard Drive to install fedora operating system and another option Try Fedora to test Fedora operating system without installation.
I select “Install to Hard Drive” to install Fedora into the new configured virtual machine.
The next window appears to choose the language for the Fedora operating system; I select English and English (United States) here.

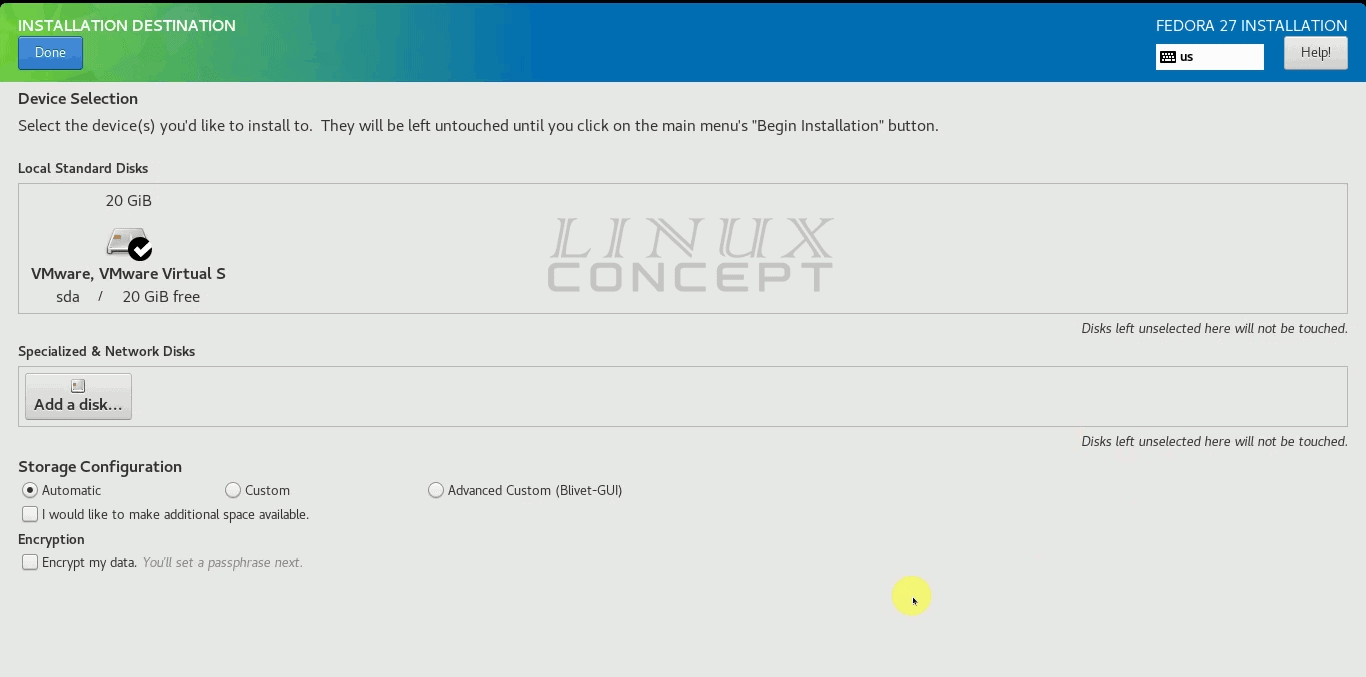
The next window shows to configure “Installation Destination” for Fedora operating system. Click on that to select the installation destination.

The new screen will show you all connected Hard disk, as I configured only one disk with the virtual machine, so I select the drive and click on “Done” button at left upper corner for further process.
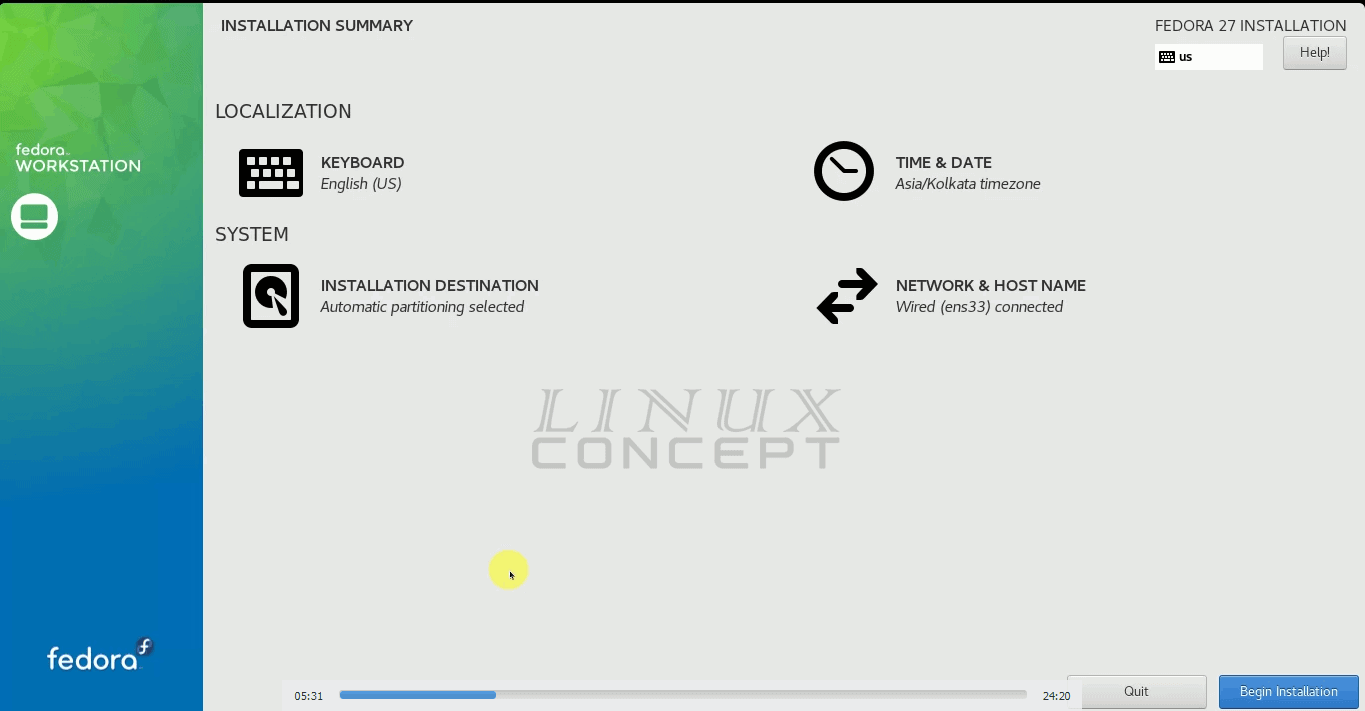
Now you will back to the previous screen and found the installation process has started as we can see in the below screen showing everything is ready to install.
Now I’ll click on the “Begin Installation” button to start the Fedora Operating system installation process.
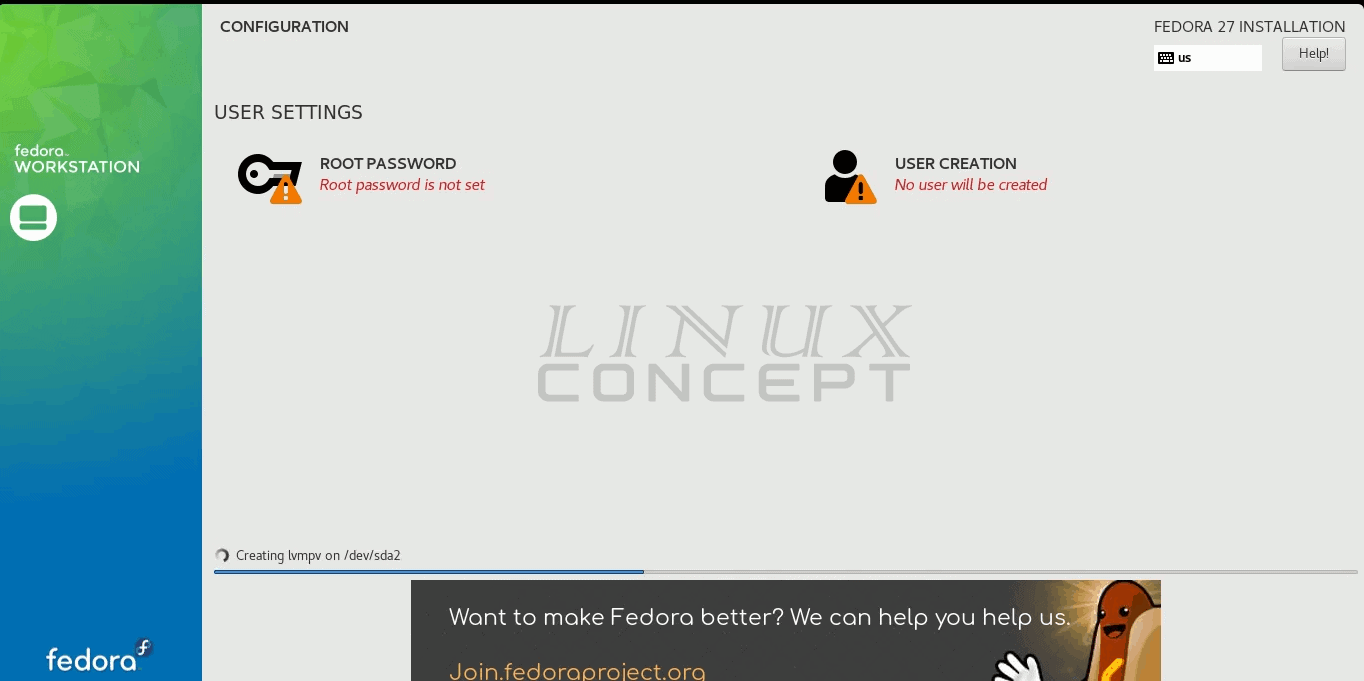
Now Fedora operating system installation process has started, and below screen shows, we need to set root password and create one user process is pending.
So, I click on “ROOT PASSWORD” to set the root password.
The new window will appear for setting root password as below image, where I set a password for use which is showing a week password.
For testing purpose, I just set the regular password, but you can configure your password as tricky as you can, and then click on the “Done” button for further process.

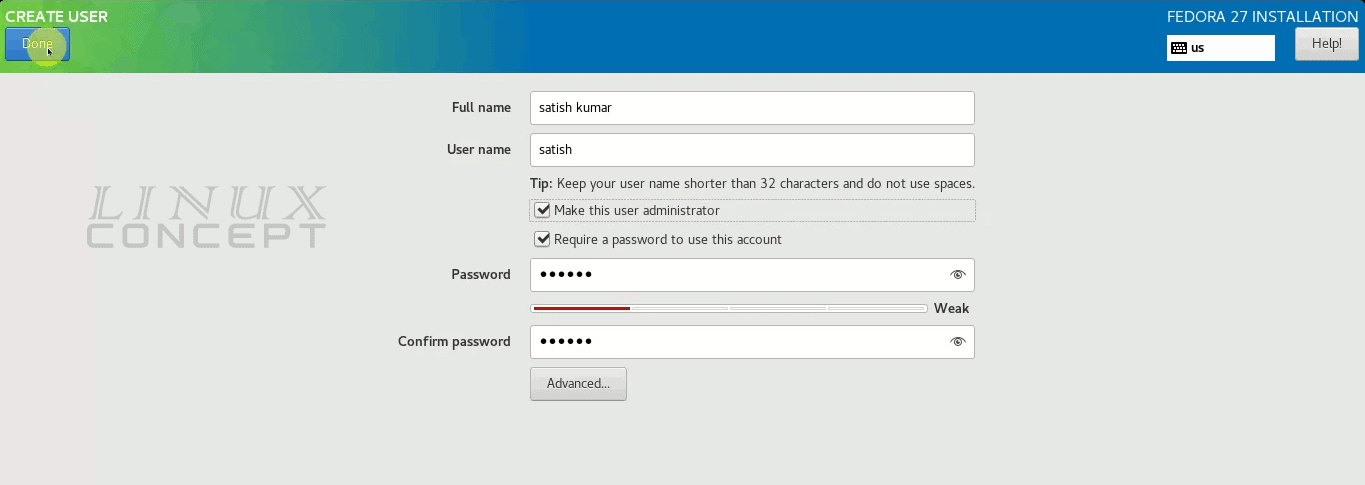
Now we start the process for creating a new user. In the new windows for creating user fill the below form with User’s name, username, and password.
If you want to assign admin privileges for this user, select “Make this user administrator” option, and click on the “Done” button for further process.
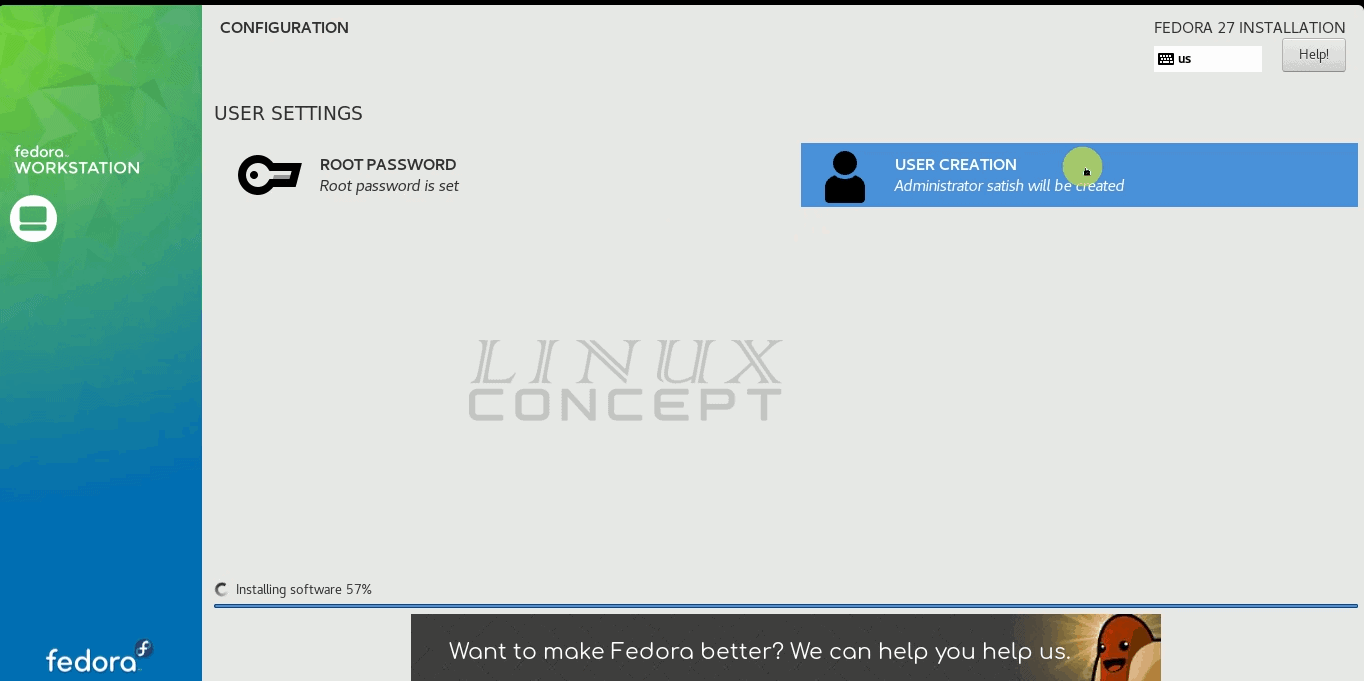
Now, we again back to the installation window where we can see the installation process completed to 57% and all dependencies are solved.
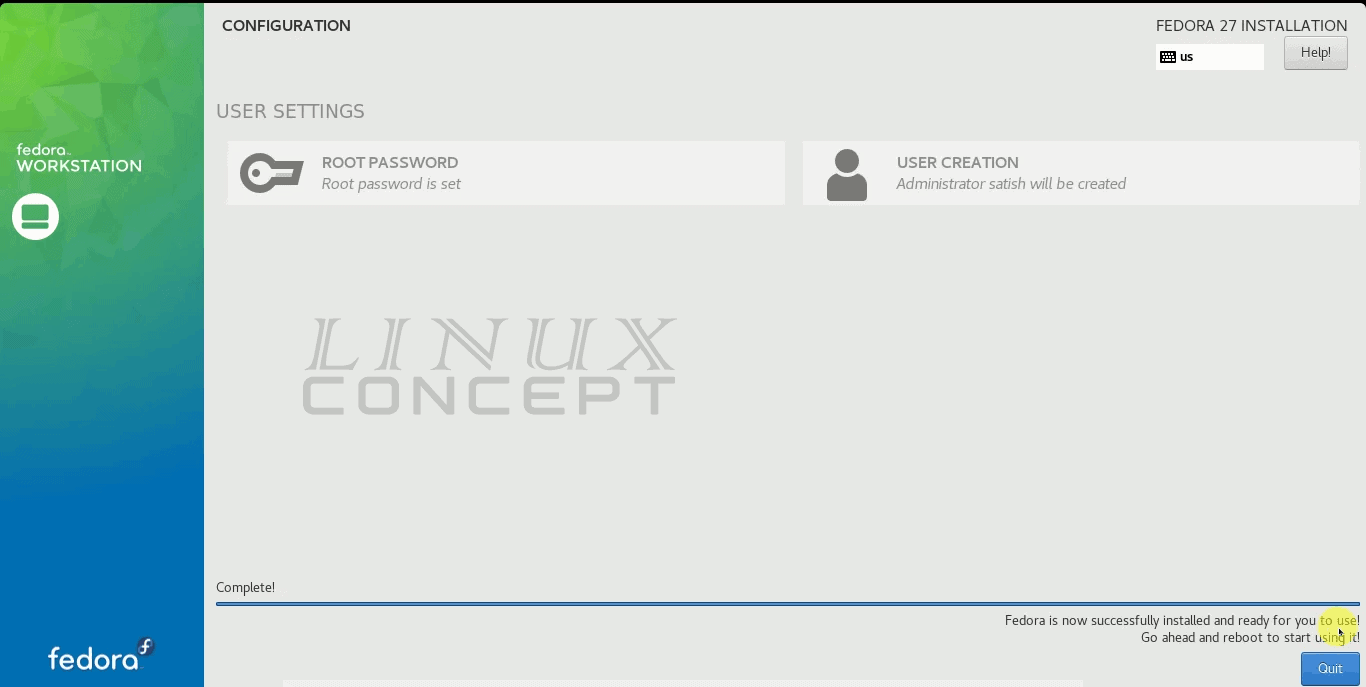
Now, after successful installation of Fedora operating system the message will show in the installation window as shown in below image”Fedora is now successfully installed and ready for you to use. Go ahead and reboot to start using!”.
Click on the “Quit” button to reboot the system with the new installed fedora operating system.
Now the virtual machine is rebooting.
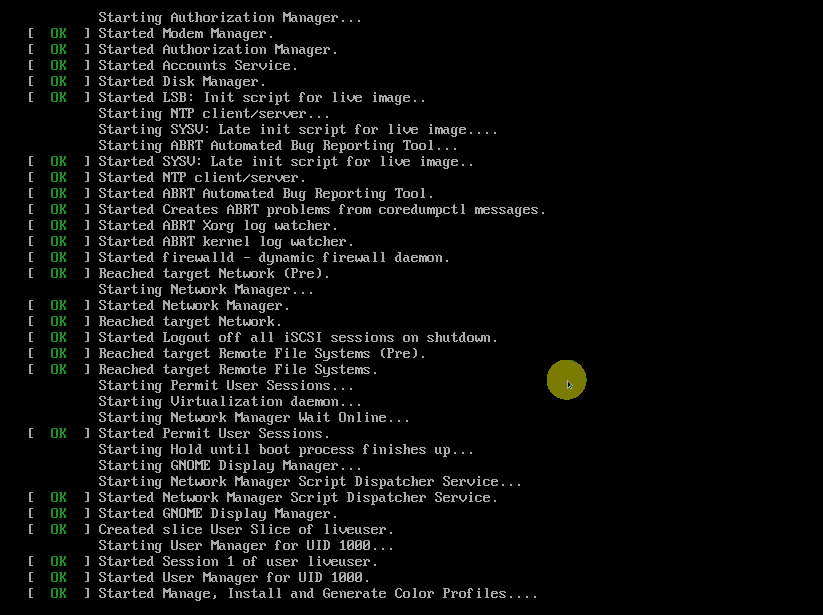
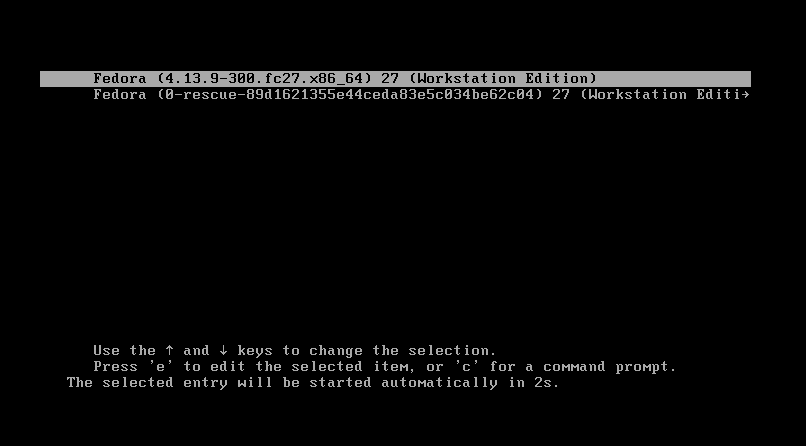
Now, the new Fedora operating system installed virtual machine is starting.
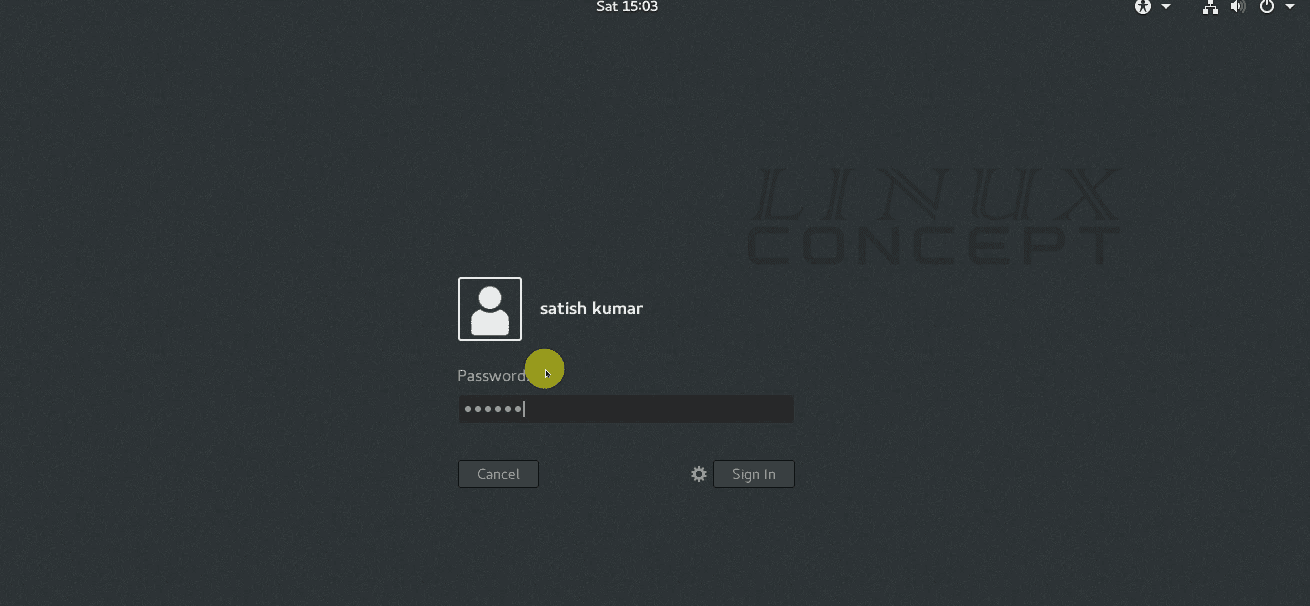
Here, we are getting login screen after starting the virtual machine; I am going to login into the system using my configured username and password at installation time.
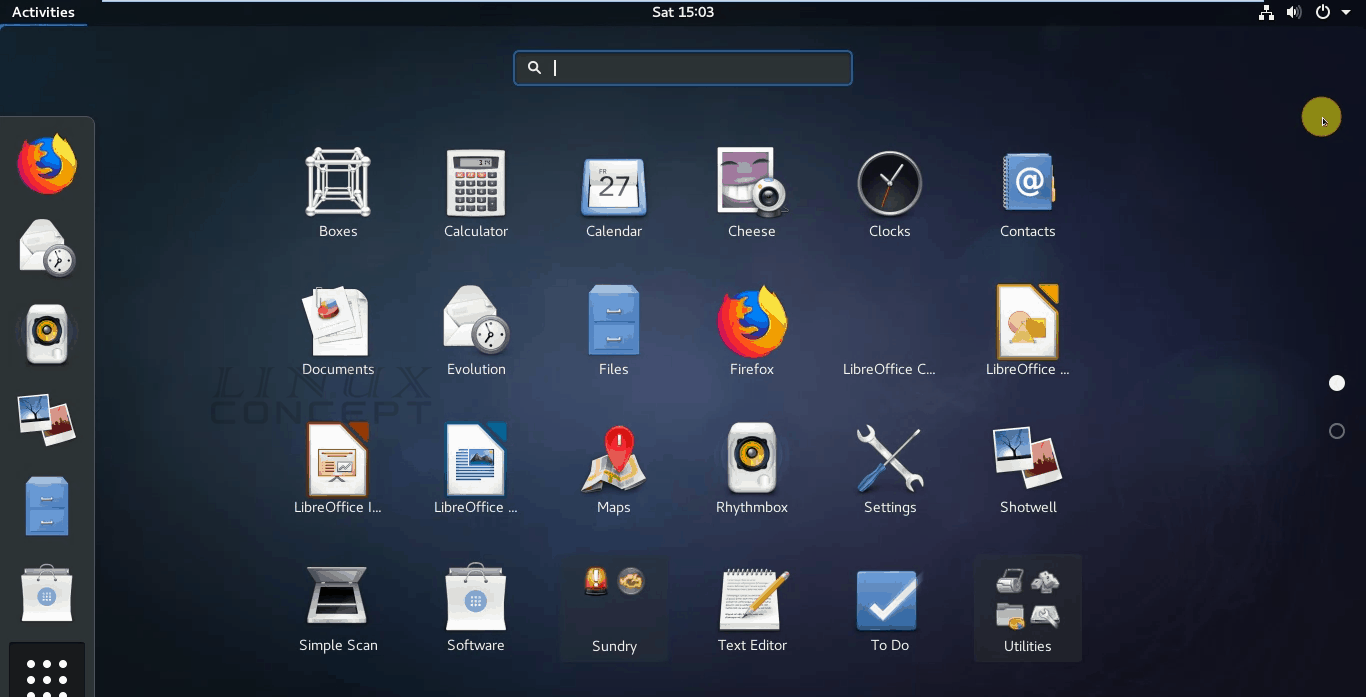
After login into the system, we will get the fedora desktop like below image.
0 Comments